How to Install LED Light Bar for Truck: Step-by-Step Instructions
Want brighter lights on your truck? This easy-to-follow guide shows you how to install an LED light bar step by step. From picking the right spot to connecting wires safely, we break it down so anyone can do it—even beginners. Get ready to light up the road like a pro!
- What Is an LED Light Bar for Truck?
- Overview of LED Light Bars
- Benefits of Using LED Light Bars on Trucks
- Common Types and Sizes of LED Light Bars
- Why Install an LED Light Bar on Your Truck?
- Essential Tools and Materials Needed for Installation
- Step 1 – Planning Your LED Light Bar Installation
- Step 2 – Preparing Your Truck for Installation
- Step 3 – Mounting the LED Light Bar
- Step 4 – Wiring and Electrical Connections
- Step 5 – Testing and Final Adjustments
- Safety Tips and Best Practices for LED Light Bar Installation
- Maintenance and Care for Your Truck’s LED Light Bar
- Where to Buy a High-Quality LED Light Bar for Truck?
What Is an LED Light Bar for Truck?
Installing an LED light bar on your truck is one of the most impactful upgrades for visibility, safety, and style. But before diving into installation, it's essential to understand what an LED light bar is and why it's a popular choice among truck owners.
Overview of LED Light Bars
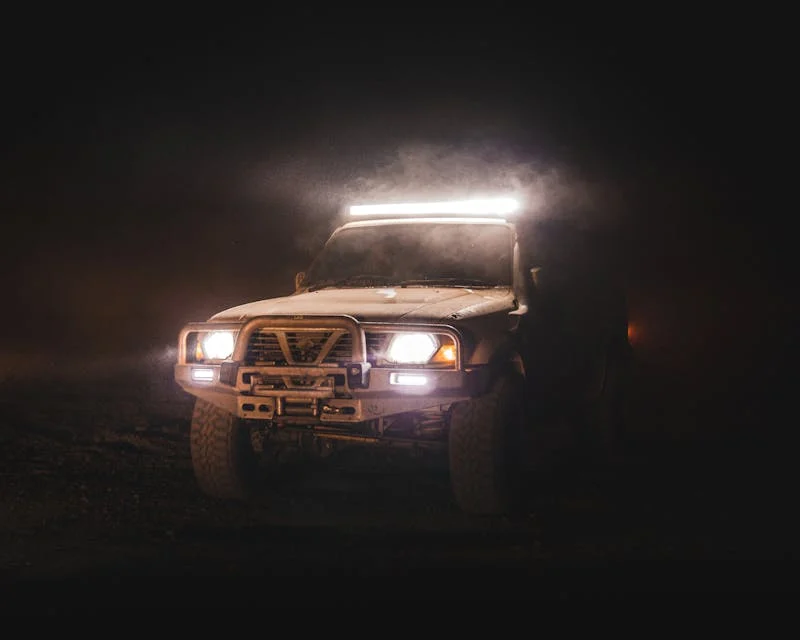
An LED light bar is a lighting accessory designed to emit high-intensity light over a wide area. Typically mounted on the roof, grille, or bumper of a truck, these bars consist of numerous LED bulbs arranged in a straight line. LED (light-emitting diode) technology is known for its energy efficiency, longevity, and brightness compared to traditional halogen or HID lights.
Benefits of Using LED Light Bars on Trucks
-
Enhanced Visibility: LED light bars provide significantly better illumination, especially in off-road, low-light, or inclement weather conditions.
-
Energy Efficiency: Consumes less power, reducing strain on your vehicle's electrical system.
-
Durability: Most models are housed in weather-resistant, shockproof casings designed to withstand rugged environments.
-
Customization: Available in various shapes, beam patterns, and color temperatures to match specific driving needs.
-

Common Types and Sizes of LED Light Bars
-
Single Row vs. Double Row: Single-row light bars offer a sleeker profile, while double-row versions deliver more lumens.
-
Curved vs. Straight: Curved bars offer a wider light spread; straight bars project a more focused beam.
-
Popular Sizes: Ranges from compact 6-inch units to massive 50-inch bars, depending on the desired lighting area and truck size.
Understanding these basics helps you select the right product for your truck, setting a strong foundation for a smooth installation process.
Why Install an LED Light Bar on Your Truck?
LED light bars aren’t just about looking cool—they serve practical and safety-related purposes that can significantly enhance your driving experience.
Improved Visibility and Safety
The primary reason for installing an LED light bar is to increase nighttime and low-light visibility. Whether you're navigating backroads, forest trails, or poorly lit job sites, a powerful LED light bar can illuminate obstacles and potential hazards well beyond the reach of standard headlights.
Enhanced Aesthetic Appeal
An LED light bar also upgrades your truck's appearance. Sleek, aggressive, and modern, these bars add a rugged edge that complements most truck designs. Many models also feature RGB color-changing options or strobe effects for a unique, head-turning look.
Applications in Off-Road and Work Environments
Truck owners in various sectors benefit from LED light bars:
-
Off-Roading: Navigate trails and rough terrains with confidence.
-
Agricultural Use: Illuminate fields during early morning or late evening operations.
-
Construction Sites: Enhance visibility for safer nighttime work.
-
Emergency and Utility Vehicles: Provide 360-degree illumination for rescue, maintenance, or inspection tasks.
Whether you're an adventurer or a professional, the versatility of LED light bars makes them a must-have addition.

Essential Tools and Materials Needed for Installation
Proper preparation is critical. Before you begin the installation, gather all necessary tools and components to ensure a smooth and efficient process.
Tools:
-
Socket set and wrench
-
Screwdrivers (flat-head and Phillips)
-
Wire stripper/crimper
-
Power drill with bits
-
Multimeter (for voltage testing)
-
Electrical tape or heat shrink tubing
-
Zip ties and cable clips
Materials:
-
LED light bar (with mounting hardware)
-
Mounting brackets (specific to your truck model)
-
Wiring harness (preferably with inline fuse and relay)
-
Toggle switch or OEM-style dashboard switch
-
Silicone sealant (for waterproofing connections)
Having everything ready saves time and prevents mistakes during installation.
Step 1 – Planning Your LED Light Bar Installation
Effective planning helps avoid mistakes and ensures optimal lighting performance.

Select the Mounting Location
Choose a spot that provides the widest and most effective light coverage. Common positions include
- Roof rack
- Bumper
- Grill
- Hood cowl
Check Local Laws and Regulations
Some areas have restrictions on the use and placement of auxiliary lighting. Research your local laws to avoid fines or mandatory removal.
Measure and Test Fit
Use a measuring tape to ensure your light bar and brackets will fit properly. Temporarily place the light bar to visualize alignment and coverage.
Review the Wiring Route
Identify a safe and efficient path from the light bar to the battery and switch location. Avoid sharp edges, heat sources, and moving parts.
Step 2 – Preparing Your Truck for Installation
Before installing the LED light bar, ensure your truck is ready to handle the modifications.
Clean the Mounting Area
Dirt or rust can interfere with secure mounting. Clean the surface with alcohol or a degreaser and let it dry completely.
Disconnect the Battery
Always disconnect the negative terminal of the battery before working with electrical components to avoid shorts or injury.
Gather Mounting Components
Lay out the brackets, bolts, and light bar. Double-check compatibility with your chosen mounting location.
Pre-drill Mounting Holes (if required)
If your truck doesn’t have pre-drilled holes, mark and drill pilot holes using a power drill. Ensure the area behind is clear of wires or structural components.
Step 3 – Mounting the LED Light Bar
With preparation complete, it’s time to mount the LED light bar securely.
Install the Mounting Brackets
Follow the manufacturer's instructions to assemble and position the brackets. Tighten bolts evenly to ensure stability.
Attach the Light Bar
Place the light bar on the brackets and secure it using the provided hardware. Use a level to ensure alignment.
Adjust the Angle
Before fully tightening, adjust the beam angle for optimal coverage. A downward angle minimizes glare and maximizes road illumination.
Secure All Components
Once satisfied with placement, torque all bolts to prevent vibrations or loosening during driving.
Step 4 – Wiring and Electrical Connections
This step is crucial for functionality and safety. Follow these directions carefully.
Connect to a Relay Harness
Use a relay harness for safer and more efficient power distribution. Connect the harness wires:
-
Red to battery positive (+)
-
Black to chassis ground (-)
-
Blue (or color-coded) to switch
-
Output wires to LED bar input terminals
Route Wires Neatly
Follow the planned path, securing wires with zip ties. Avoid routing through areas with sharp edges or moving components.
Install the Switch
Drill a hole in the dash or use an existing switch blank to mount the toggle or OEM-style switch. Connect the switch wiring per harness instructions.
Seal All Connections
Use heat shrink tubing or electrical tape on all exposed connections. Apply silicone sealant to waterproof areas vulnerable to moisture.
Step 5 – Testing and Final Adjustments
Before hitting the road, verify everything is working correctly.
Reconnect the Battery
Reconnect the negative terminal and double-check all wiring and mounting points.
Test Functionality
Turn on the switch to verify that the light bar activates correctly. Use a multimeter if needed to test voltage.
Fine-Tune the Angle
If needed, make final adjustments to the beam angle. Perform a night-time test in a dark area to assess beam spread.
Secure Loose Ends
Trim zip ties and recheck all bolts. Ensure there is no wire slack that can catch or fray.
Safety Tips and Best Practices for LED Light Bar Installation
Safety should always be a top priority when installing an LED light bar on your truck. Start by avoiding electrical hazards—always disconnect the vehicle’s battery before beginning any wiring work, and double-check all connections for proper polarity to prevent short circuits or potential fire risks. Use the right tools and wear protective gear: insulated tools, gloves, and safety glasses can protect you from injury when drilling or handling wires. Additionally, make sure your installation complies with local traffic laws and regulations. Some regions restrict the use of auxiliary lighting on public roads or require covers for light bars when not in use. Researching and following these laws ensures safe and legal operation of your lighting system.

Maintenance and Care for Your Truck’s LED Light Bar
Proper maintenance is essential to ensure the long-term performance, brightness, and safety of your truck's LED light bar. Here are several key steps to keep your lighting system in top condition:
-
Clean Regularly
Over time, LED light bars accumulate dirt, bugs, dust, and road grime, which can reduce their brightness and effectiveness. Use a soft cloth or sponge with mild soap and water to gently clean the lens and housing. Avoid abrasive cleaners or rough brushes that may scratch the surface. Regular cleaning not only maintains visibility but also helps prevent long-term damage from corrosive elements.
-
Inspect for Damage
Periodically inspect the entire light bar system for signs of wear or damage. Look closely at the housing for cracks or moisture inside the lens, which could indicate a compromised seal. Examine the wiring for frays, exposed conductors, or signs of corrosion, and check the brackets for rust or bending. Promptly addressing these issues can prevent electrical failures and extend the lifespan of your equipment.
-
Tighten Mounts
LED light bars are often mounted in high-vibration environments, especially if you drive off-road or on rough terrain. Over time, mounting bolts and brackets may loosen. Regularly check and tighten all mounting hardware to ensure the light bar remains securely attached and properly aligned. This helps prevent damage to both the light and your vehicle.
-
Protect from Corrosion
Electrical connections are especially vulnerable to moisture and corrosion. To protect them, apply dielectric grease to all connectors to prevent water ingress and ensure good electrical contact. Use heat shrink tubing or weatherproof wraps to seal any exposed wiring. If your vehicle is frequently exposed to snow, rain, or salty roads, these steps are even more critical to avoid short circuits and maintain consistent performance.
Where to Buy a High-Quality LED Light Bar for Truck?
When selecting a supplier, look for one with a proven track record, quality certifications, and customization options. This ensures you get reliable performance and support for your specific needs.
Bliauto stands out as a trusted partner in automotive LED lighting. As a leading manufacturer, Bliauto offers high-quality, energy-efficient LED light bars and custom solutions tailored to the automotive industry. Whether you need off-road lighting, work lights, or private label services, Bliauto provides the reliability and innovation needed to illuminate your path. Reach out today to discover how Bliauto can support your next truck lighting upgrade.
If you’d like to compare specifications, brightness levels, and durability across leading brands, head over to our Top 5 LED Light Bars for Trucks in 2026 review on this page.
Learn more about our automotive lighting products.

Bliauto Motorcycle Headlight - Model C1H-WA: High-quality LED design from leading brand manufacturers of motorcycle headlights. Precision Manufacturing Motorcycle Headlight ensures high visibility, durability, and easy fit for all riders.

Bliauto JS1 Jump Starter – Reliable Power On-the-Go As a brand manufacturer & wholesale jump starter supplier, Bliauto delivers high-quality portable power solutions. The JS1 Jump Starter provides instant engine starts, USB charging, and durable performance—ideal for emergencies. Trusted by professionals, it’s compact, safe, and backed by expert engineering. Wholesale options are available—power up with Bliauto! Optimized for SEO with target keywords while maintaining clarity and brand authority. Let me know if you'd like refinements!

Bliauto Motorcycle Headlight - Model C1H-HL: High-quality brand motorcycle headlight with durable LEDs, easy installation, and high-beam performance. Trusted brand manufacturers motorcycle headlights for safety. Choose Manufacturing Motorcycle Headlight quality.

Bliauto Motorcycle Headlight - Model C2H-HL: high-brightness, energy-efficient LED beam for superior visibility and durability. Perfect for brand manufacturers of motorcycle LED headlights, manufacturing motorcycle LED headlights, and brand motorcycle LED headlight supply.
Connect with Bliauto for Automotive LED Lights Solution
Bliauto is dedicated to designing innovative automotive LED lighting systems. Let's talk about your needs!
© 2025 Bliauto All Rights Reserved.


Bliauto
Bliauto Light
Bliauto
Bliauto Light
Bliauto
Whatsapp: +8618811846160